
Malenia attacks fast, heals when she lands hits, and returns in a second phase. You don't beat her by brute force, you beat her by understanding the fight. This guide follows the order you'll prepare in:
- How to reach her arena.
- Why she lasts so long, and what to hit her with.
- What character you need, and two ready build foundations.
- How to survive phase one, the Waterfowl Dance, Scarlet Aeonia and the phantoms.
- How to practice so that every attempt teaches you something.
Malenia is Marika's daughter and Miquella's sister. She has carried the Scarlet Rot since birth. Protecting her brother, she bears the name Blade of Miquella.
Her duel with Radahn ended with no victor, and the rot laid waste to Caelid. Now Malenia awaits her brother at the Haligtree.
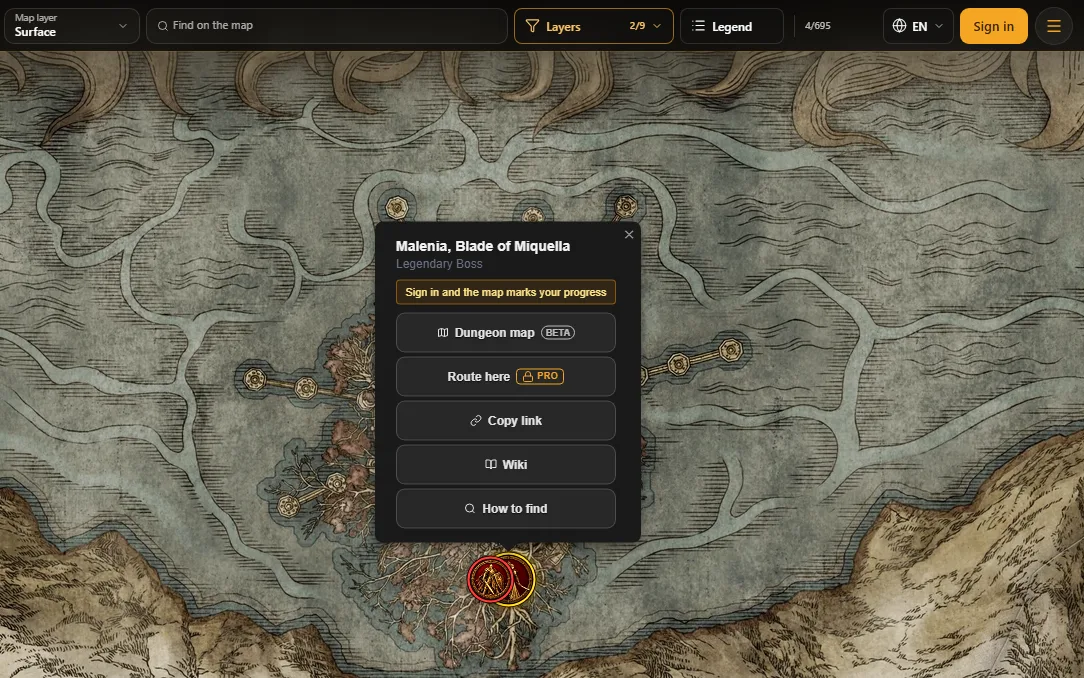
Malenia's marker on the map: Malenia, Blade of Miquella
First, collect the Haligtree Secret Medallion: without it the way to the Haligtree stays shut. It comes in two halves, and you can collect them in any order.
- Left half
- - Haligtree Secret Medallion (Left) is in Castle Sol, after you defeat Commander Niall.
- Right half
- - Haligtree Secret Medallion (Right) is with Albus, in the Village of the Albinaurics in southern Liurnia.
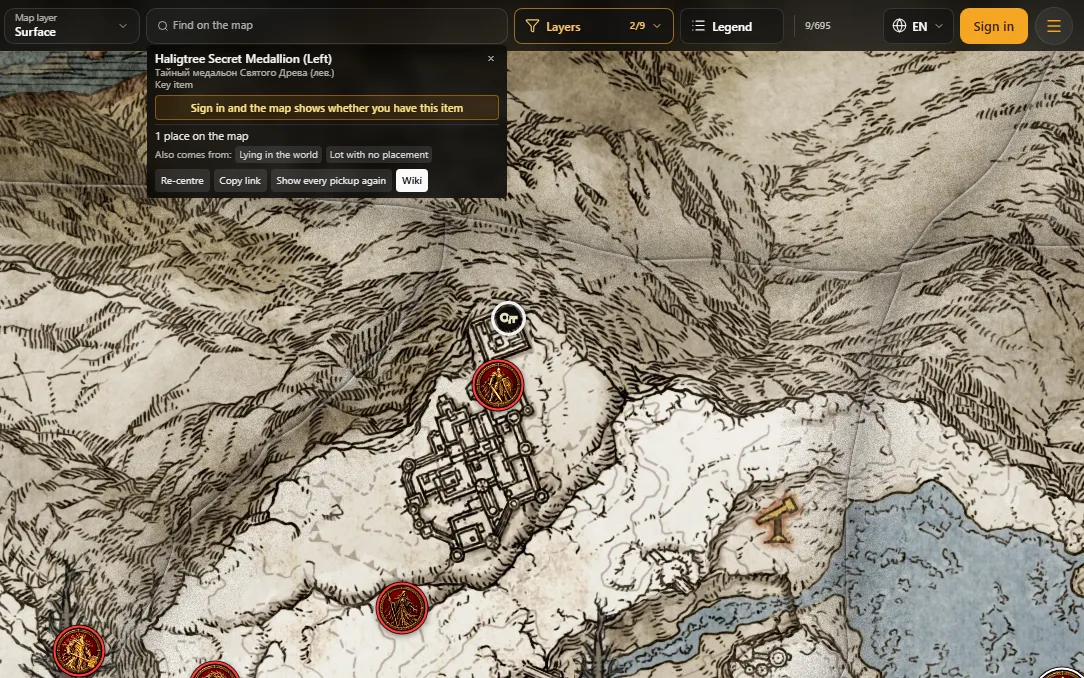
The left half on the map: Haligtree Secret Medallion (Left)
Albus gives you the right half: Village of the Albinaurics on the map
The order of landmarks: the Grand Lift of Rold, the Hidden Path to the Haligtree, the Consecrated Snowfield and Ordina, Liturgical Town. In Ordina an evergaol with four flames is waiting, and until they're lit, the portal to the Haligtree stays sealed.
- At the Grand Lift of Rold, choose the option to use the secret medallion.
- Take the Hidden Path to the Haligtree and come out onto the Consecrated Snowfield.
- Head north to Ordina.
- Enter the evergaol: inside, you need to light four flames.
- The first flame is on the ground, next to a statue.
- For the second, climb the ladder up the tower: the flame is at the top.
- The way to the third tower runs across the rooftops. Climb up and light the third flame.
- Make your way to the fourth tower and light the last flame to break the seal.
- Climb the long staircase and enter the portal.
The lift where the route begins: Grand Lift of Rold on the map
Past the portal the Haligtree begins. You'll change height many times here, by ladders and lifts, so go from grace to grace and rest at every new one.
- After the portal, head down along the branches of the Haligtree.
- Next, the path runs through the town.
- Loretta, Knight of the Haligtree, guards the way forward. Defeat her.
- After the fight, go down the long staircase, then take the lift in the tower. This brings you to Elphael.
- Activate the Prayer Room site of grace.
- Make your way through the fortifications to Elphael Inner Wall: there's a site of grace here too.
- Cross the lake of rot: follow the roots to the passage on the far side.
- Go down the ladder. At the bottom is the Drainage Channel site of grace.
- Outside, move along the branches and the stone supports. Reach the church roof and drop in through the opening.
- Inside, find the lift and ride it down to the Haligtree Roots site of grace.
- All that's left is to go down to the fog. Malenia is waiting behind it.
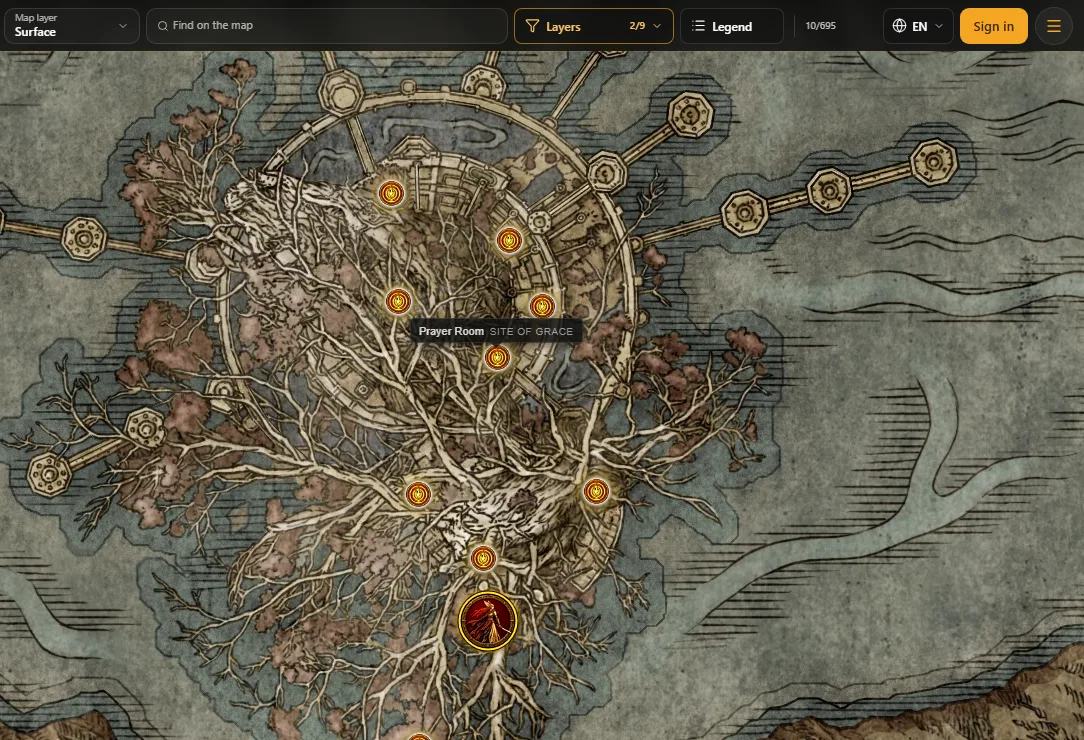
The lake of rot builds scarlet rot on you. Take a cure for it before you go down: you'll need it in the fight itself as well.
The last grace before the fight: Haligtree Roots on the map
These numbers are for a first playthrough, solo:
- Phase one
- - 18,473 HP.
- Phase two
- - starts at about 14,800.
- Total
- - about 33,300, not counting healing.
The key feature is her healing. Hits on you or on a summoned spirit restore her health. Even a hit on your shield heals the boss. So trading hits usually works against you: you hit her, she hits back, and she gets back part of what you took.
Hence the main rule of the fight: one clean hit with no reply is worth more than three hits you paid for by getting hit.
Absorption is the share of damage Malenia cuts off. The lower the absorption, the more damage gets through.
- Fire
- - 0%.
- Physical
- - 10%.
- Magic and lightning
- - 20% each.
- Holy
- - 40%.
But the result depends on more than these numbers: on your weapon, the boss's defense and the conditions of the fight. For example, water weakens fire and strengthens lightning. As for status effects:
- Frostbite
- - first threshold 306.
- Bleed
- - first threshold 421.
That's status buildup, not the damage dealt when it triggers. The thresholds rise after each proc. While frostbite is active, it can't build up again. Fire removes frostbite together with its temporary defense drop: keep that in mind if your build has both frost and fire.

To see the same numbers against your own build, pick Malenia in the lab's Target section. Build lab
Our example builds are made for player level 120. That's your character's level, not the boss's. It's a guideline, not a requirement.
- ✦Vigor: 50 to 60.
- ✦A regular weapon: +24 or higher.
- ✦A special weapon: +9 or higher.
- ✦Equip load under 70%, so your roll stays medium.
- ✦A rot cure: bring it with you, in advance.
Vigor matters more than damage here: Malenia punishes every mistake, and a health buffer gives you time to recover from one.
Two builds for a level 120 character. These are foundations, not a promise of a two-hit win. The armor uses no Tarnished Edition items. Stats are listed in the game's order.
Build A · Strength and frost. Weapon: Cold Giant-Crusher +24. The Cold affinity is unlocked by the Glintstone Whetblade.
- Vigor
- - 52
- Mind
- - 16
- Endurance
- - 28
- Strength
- - 63
- Dexterity
- - 10
- Intelligence
- - 10
- Faith
- - 10
- Arcane
- - 10
- Attack power
- - 787, frostbite 150 per hit
- HP with talismans
- - about 1,965
- ✦Armor: Omensmirk Mask, Veteran's Armor (Altered), Banished Knight Gauntlets, Crucible Greaves.
- ✦Talismans: Dragoncrest Greatshield Talisman, Great-Jar's Arsenal, Crimson Amber Medallion +2, Erdtree's Favor +2.
- ✦Weight 66.2 of 96.7, that's 68.5% equip load and a medium roll. The margin before a heavy roll is small, about 1.5.
Build B · Faith and a health buffer. Weapon: Flame Art Grave Scythe +24. The Flame Art affinity is unlocked by the Red-Hot Whetblade.
- Vigor
- - 60
- Mind
- - 10
- Endurance
- - 34
- Strength
- - 19
- Dexterity
- - 17
- Intelligence
- - 10
- Faith
- - 39
- Arcane
- - 10
- Attack power
- - 677, bleed 55 per hit
- HP with talismans
- - about 2,134
- ✦Armor: Banished Knight Helm, Bull-Goat Armor, Banished Knight Gauntlets, Bull-Goat Greaves.
- ✦Talismans, all defensive: Dragoncrest Greatshield Talisman, Crimson Amber Medallion +2, Erdtree's Favor +2, Great-Jar's Arsenal.
- ✦Weight 69.8 of 105.1, that's 66.4% equip load and a medium roll.
Attack power is the number in the weapon menu, not the damage of one hit on Malenia. The Dragoncrest Greatshield Talisman reduces the physical damage you take. Heavy armor softens a mistake, but it doesn't cancel her grab, the Waterfowl Dance or her healing. Changed your armor? Recheck your equip load.
If neither foundation suits you, there are three fallback options:
- ✦For damage: Flame Art Grave Scythe with 40 Vigor and 56 Faith. The Fire Scorpion Charm boosts fire but raises the physical damage you take: a risky trade while you're still learning.
- ✦Defensive: Morning Star, with 58 Vigor and 33 Faith. Handy for its short swings.
- ✦Balanced: Prelate's Inferno Crozier, with 52 Vigor and 47 Strength. A heavy weapon needs careful timing of each swing and doesn't promise nonstop staggers.
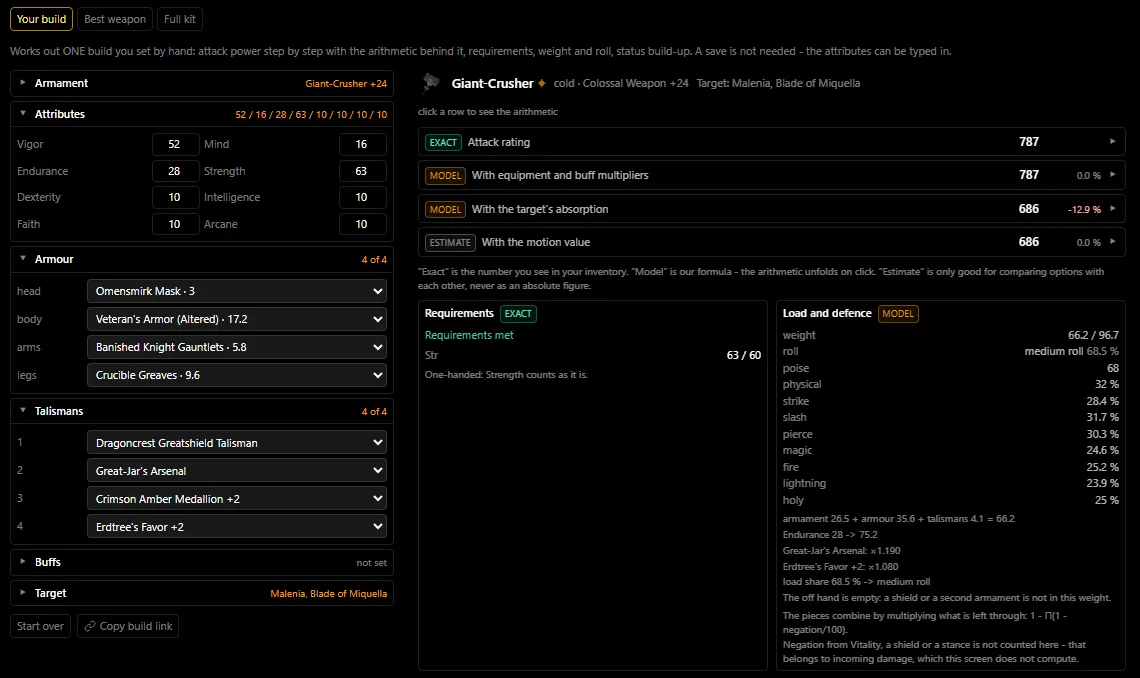
The easiest place to fit gear to your own character is the build lab on our site, eldenring.krut.top. It's part of Pro: a one-time purchase, no subscription.
- Open the build lab.
- Load your save file: the lab takes your stats and gear from it. Without a save you can type the stats in.
- Choose the target: Malenia.
- On the «Full kit» tab, choose what to build for: damage, poise, defence, survival or balanced.

The build index helps you compare gear with each other. It's not the damage of a single hit or skill: skills and buffs aren't part of this calculation. The lab helps you pick a foundation, but whether a weapon feels right you'll only find out in the fight. After changing armor, check your equip load, and remember that shields and armor don't stop Malenia's healing.
The map shows where to get the items for both builds. The Grave Scythe isn't lying anywhere, it drops from enemies: the «Show areas» button in its card draws where they roam. The Omensmirk Mask drops from an Omenkiller, the Banished Knight Helm and Gauntlets from Banished Knights. Veteran's Armor is sold, and the Altered version is made at a Site of Grace.
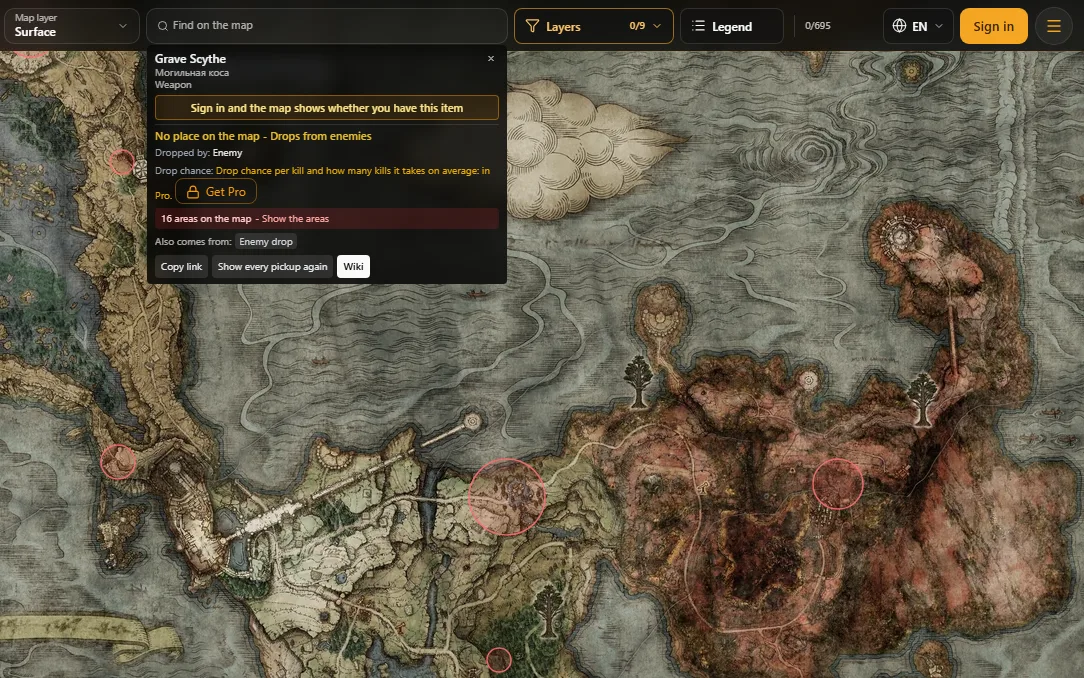
Build B's weapon: Grave Scythe on the map
Build A's weapon: Giant-Crusher on the map
In phase one, don't attack after every pause. Malenia can continue her combo right away, and a pause that looks like the end of an attack is often its middle.
- ✦Keep your distance and read her movement.
- ✦A clear window to respond comes after a missed lunge or grab.
- ✦On your first attempts, answer with a single hit and keep stamina to back off.
- ✦If Malenia keeps moving or leaps back, stop your own combo.
- ✦Save stamina for running and a few dodges.
Malenia's poise is 80. Heavy attacks help break her stance, but they don't interrupt every move: some animations can't be interrupted at all, and an ordinary flinch isn't a broken stance.
The Waterfowl Dance is Malenia's most dangerous attack. The key signal: she rises and hangs in the air with her blade ready. This is the start of the dance.
In the video's example the player has a light load. He runs from the first wave, then changes direction. Watch the whole attack at least once without trying to beat it: movement and timing matter more than repeating buttons by rote.
Keep free space behind you at all times. A dance that starts with your back to a wall is far harder to survive.
- First wave: as she takes off, run away from Malenia at once. In the example the player also jumps while running as she starts to close in.
- Her next approach: roll toward Malenia and past her back.
- The camera turns: change direction and get out of the range of the finishing hits.
- Wait for the last whirlwinds to vanish. A lingering whirlwind is still dangerous, so don't rush to respond to the first opening.
This approach needs distance and open space. If you're stuck at a wall or still finishing a heavy swing, the same inputs won't give the same result.
Up close, simply running back often won't save you. Getting stuck in a heavy attack animation is just as dangerous: you can't run out of it in time. What's left:
- Dodging without lock-on
- - slipping under Malenia with the camera lock turned off. It's a separate, difficult technique that takes practice.
- Shield
- - a shield with good defense and stability can save you, but the hits on it will still restore Malenia's health.
- Freezing Pot
- - interrupts the attack only if frostbite procs. After repeated procs the threshold rises, and one pot may not be enough.
The Freezing Pot recipe is in the Glintstone Craftsman's Cookbook [6]: The cookbook on the map
Phase two begins with Scarlet Aeonia: Malenia dives from above, and a flower blooms where she lands.
- Watch for the moment she drops and get out of the line of the hit.
- Keep backing away from the explosion that follows.
- Don't step into the flower: the petals are dangerous and build up rot.
- At a safe distance, you have time for a flask, a buff or a ranged attack.
The flower keeps building scarlet rot for a while. Don't run back into the petals for a hit.
When Malenia hangs in the air and sends out her phantom copies, don't stand right under her. Keep her in view and dodge the phantoms' attacks one by one as they come in.
After the phantoms, Malenia herself lunges, with a delay. An early relaxed step or a heal often lands right under that lunge. Wait for it to end before you heal or respond.
The phantoms are gone, but the attack isn't over. It ends with Malenia's own lunge.
Malenia can dodge regular projectiles. If you play a mage, attack while she recovers after a combo, or while her attention is elsewhere.
- Black Knife Tiche
- - a summoned spirit that can help.
- Mimic Tear Ashes
- - can help too, but prepare a clear, simple build for the Mimic Tear in advance.
- Golden Vow
- - a buff incantation for a Faith build.
- Flame, Grant Me Strength
- - another buff.
- Preserving Boluses
- - a cure for rot.
- Flame, Cleanse Me
- - an incantation against rot.
Hits on a spirit heal the boss too. If your spirit keeps taking hits, weigh whether its help outweighs that healing. For incantations, check the stat requirements, the cost and which buffs stack.
Tiche on the map: Black Knife Tiche
- First attempt: survival only. Learn to recognize her lunges, her grab and her long combos.
- Second: add one safe response after attacks you know.
- Third: practice the Waterfowl Dance on its own and save your flasks for phase two.
- After every death, fix one specific mistake: your position, your roll timing or that one extra hit.
Change one thing at a time, and you'll see what actually helps. The first-playthrough reward is 480,000 runes, Malenia's Great Rune and the Remembrance of the Rot Goddess.
Map, progress tracking and build planning are on our site. Links to every item from the video are in its pinned comment, and each one opens the exact spot on the map.
Start with the map: eldenring.krut.top
Footage and rights
Elden Ring © Bandai Namco / FromSoftware