Eight stats, three bars, letters on your weapons, and words in the menus nobody explains. The game tells you none of it, and for the first hours it feels like a wall. Below is the alphabet: everything you need so the game stops feeling like a wall. The chapters answer these questions:
- ✦Spend your runes or save them?
- ✦What should you level first?
- ✦Why does the green bar matter?
- ✦Why do you roll like a log?
- ✦What do the letters on a weapon mean, and how do you upgrade it?
- ✦How do you deal massive damage?
- ✦What is that bar filling over your head?
- ✦How do you call for help?
Runes are both your money and your experience. You spend them at merchants, and you spend them to level up at a Site of Grace. One currency for everything, so every purchase is a choice between a new level and a new item.
A Golden Rune in your inventory is savings. You use it like an item, and the runes are added to what you're carrying. While it sits in your bag, you won't lose it when you die. So don't use Golden Runes the moment you find them, use them when you're ready to spend.
A good habit: walk up to a grace or a merchant with a plan, use the Golden Runes you need, and spend right away. Then a death on the way costs you almost nothing.
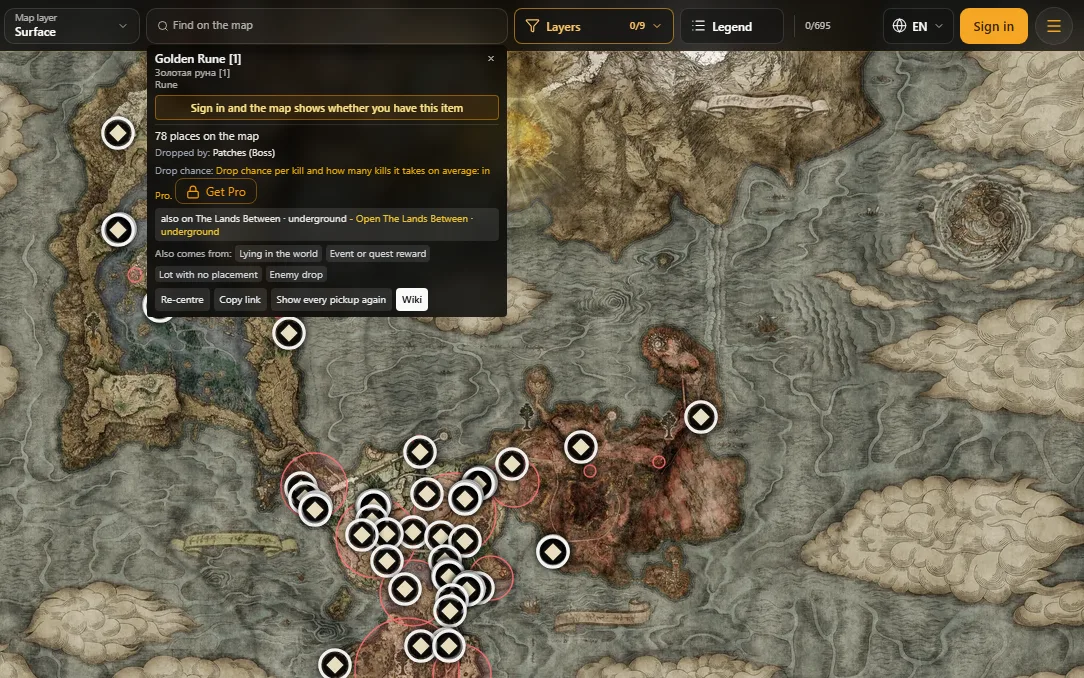
Golden Rune [1] has 78 spots on our map. Find them with «Find on the map», or straight from this link: Golden Rune [1] on the map
The level up screen at a grace shows eight lines. Here is what each one actually does, in the order the game lists them:
- Vigor
- - your health. As a beginner, raise it first: extra health forgives mistakes while you learn to fight.
- Mind
- - FP, the blue bar for spells and weapon skills.
- Endurance
- - stamina and how much you can carry.
- Strength
- - for weapons.
- Dexterity
- - also for weapons.
- Intelligence
- - powers sorceries.
- Faith
- - for incantations.
- Arcane
- - powers bleed and adds Discovery, so items drop more often.
A tip if you ever play in Russian or talk to Russian players: there Mind is called «Интеллект», and Intelligence is «Мудрость». It's the most common mix-up in that version, and a mage who levels the wrong one gets no stronger.
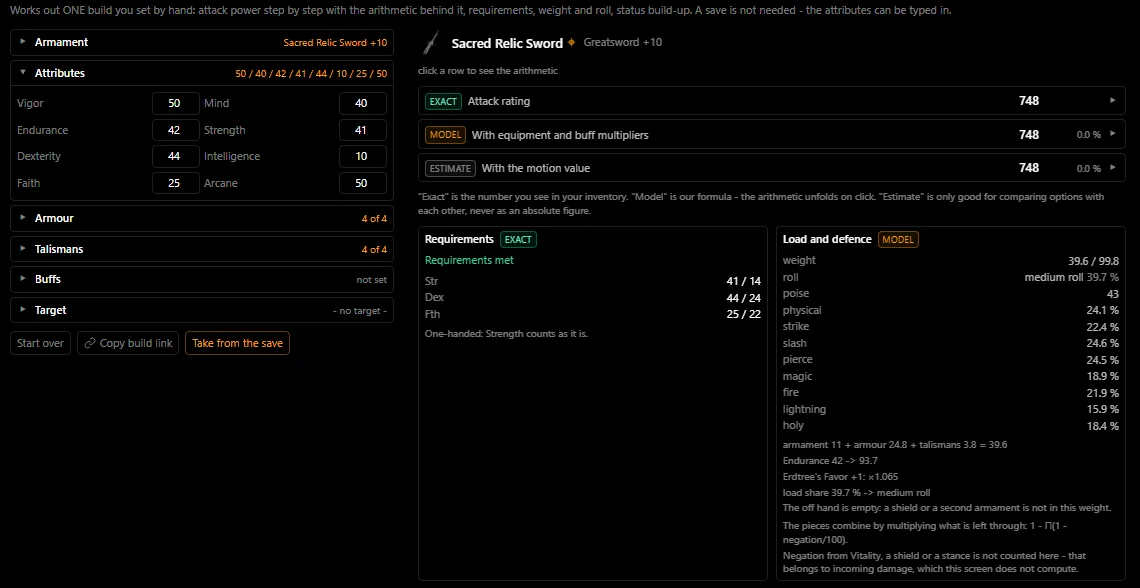
To see how stats change a weapon's power, use the build lab on our site. «Take from the save» fills in your own character, and without a save you can type the stats in. Build lab (part of Pro).
There are three bars in the corner of the screen:
- Red
- - health.
- Blue
- - FP, for spells and weapon skills.
- Green
- - stamina.
Every attack, roll and block costs stamina. When it runs out, you can't attack or dodge. That's the most common way beginners die: a long string of hits, nothing left for the roll, and the enemy hits back.
Never drain the green bar to zero. Keep enough for at least one roll: it's worth more than your last hit.
Flasks come in crimson, for health, and cerulean, for FP. You split them at a Site of Grace, and it pays to split them for the way you play: if you don't spend FP, you hardly need cerulean ones.
Everything you wear has weight, and your roll depends on how much of your limit you use. In the equipment menu that's the Equip Load line, with a word next to it that tells you what roll you get:
- Light Load
- - under 30 percent: a fast roll.
- Med. Load
- - under 70 percent: a normal roll.
- Heavy Load
- - above 70 percent: a slow roll.
- Overloaded
- - over 100 percent: you can barely dodge.
Stay under 70 percent. If you can't, raise Endurance: it raises how much you can carry, so the same armor takes a smaller share. «Rolling like a log» almost always means you went past 70.
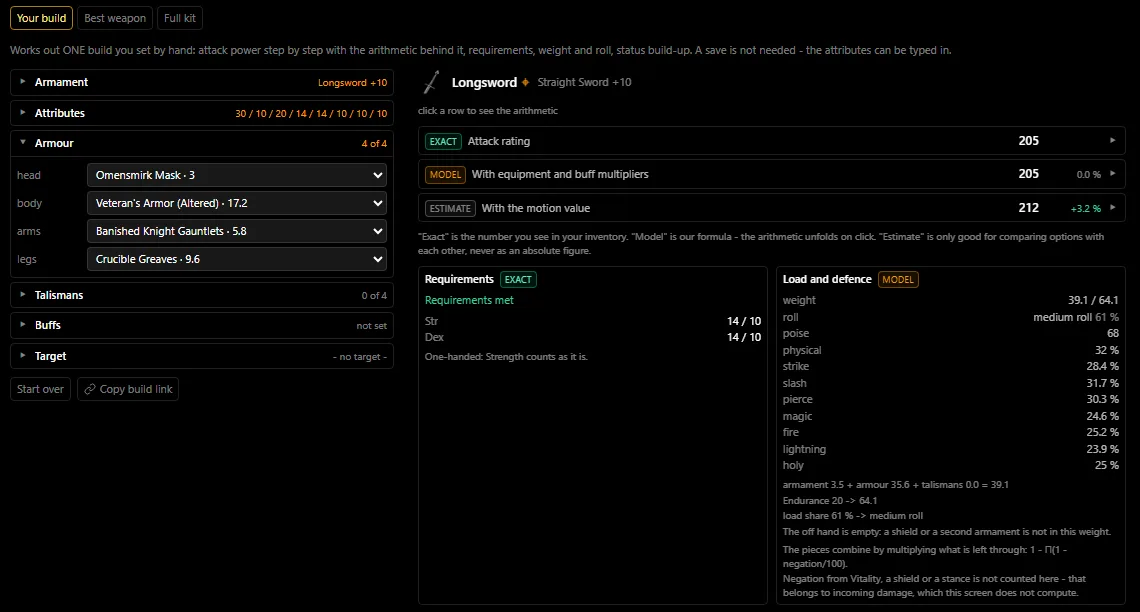
Check the weight before you put on new armor, in the build lab: Check your build's weight
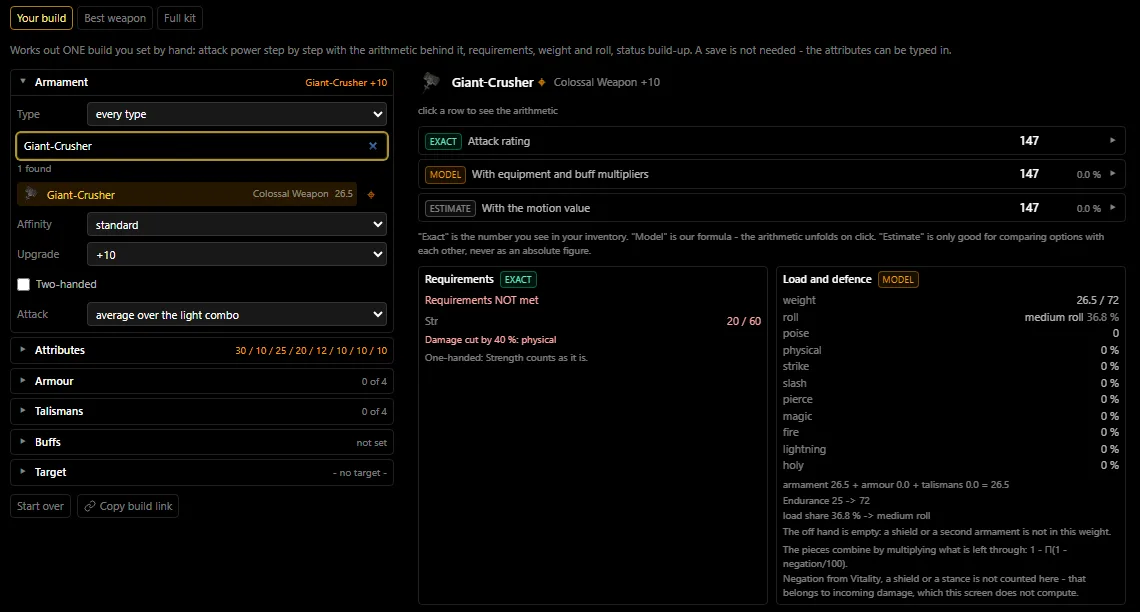
Weapons have two lines that matter, and both are in the weapon's details:
- Attribute requirements
- - if your Strength or Dexterity is too low, the weapon hits weakly. Meet the requirements first, then think about scaling.
- Attribute scaling
- - the letter tells you how much damage grows with a stat. The letter S is the most, the letter E is barely anything.
Weapons are upgraded at a smith, with two kinds of stones:
- Regular weapons
- - with Smithing Stones, up to +25.
- Special weapons, with their own skill
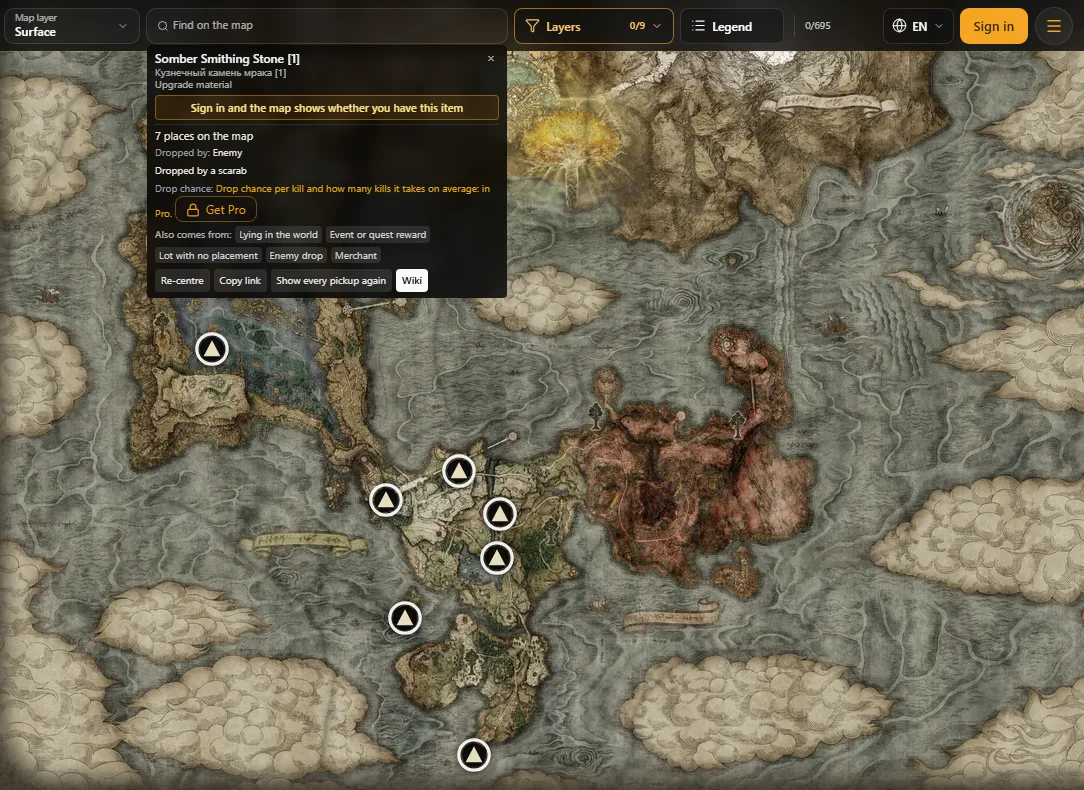
- - with Somber Smithing Stones, up to +10.
Somber stones are rare. Type Somber Smithing Stone into the search on our map, and it shows where they lie. The first tier, Somber Smithing Stone [1], has seven spots on the map.
An Ash of War changes a weapon's skill and its affinity. The affinity decides which stat the damage grows from: Heavy grows damage from Strength, Keen from Dexterity. For that you need the Whetstone Knife, which lies in the cellar of the Gatefront Ruins.
The Whetstone Knife on our map: Whetstone Knife, one spot at the Gatefront Ruins.
Combat in Elden Ring rests on a handful of moves. Each is worth learning on its own, and the last three are where the massive damage comes from.
- Roll
- - at the start of a roll you're invulnerable. So roll through the attack, not away from it.
- Block
- - a shield stops a hit, but costs stamina.
- Parry
- - breaks the enemy's stance, and your next hit is a critical one, with huge damage.
- Backstab
- - you can land the same critical hit from behind.
- Broken stance
- - heavy attacks and jump attacks break stance too: the enemy drops to one knee, and you can strike critically again.
- Two-handing
- - a weapon held in both hands hits harder: your Strength counts one and a half times.
Two-handing helps with requirements too: if you're just short on Strength for a heavy weapon, holding it in both hands may be enough.
The build lab has a «Two-handed» switch: turn it on and watch the requirements and attack power change. Open the build lab
Poison, blood, frost and the rest build up on a bar. When it fills, the effect hits. When a status builds up on you, the bar grows over your character.
- Blood loss
- - takes a big chunk of health at once.
- Poison
- - drains health over time.
- Scarlet rot
- - also drains health over time.
- Frostbite
- - makes you take more damage.
- Sleep
- - stuns you.
- Madness
- - also stuns you.
- Death blight
- - kills instantly.
Each one has its own resistance line on the status screen:
- ✦Immunity: against poison and rot.
- ✦Robustness: against blood and frost.
- ✦Focus: against sleep and madness.
It works on enemies too. A bleed weapon is one of the easiest ways to win: the bar builds with every hit and, once full, takes a big chunk of health in one go.
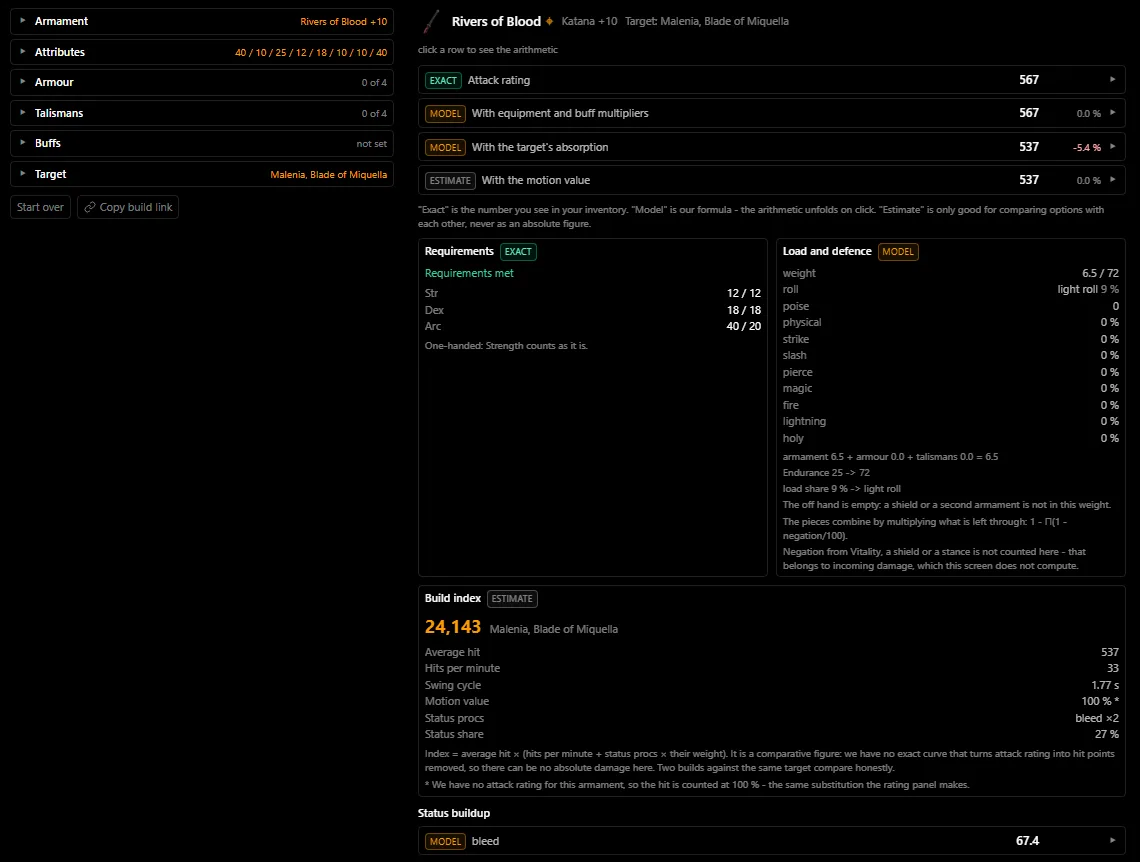
How many hits it takes to make a particular boss bleed, the build lab will work out: Work out status buildup
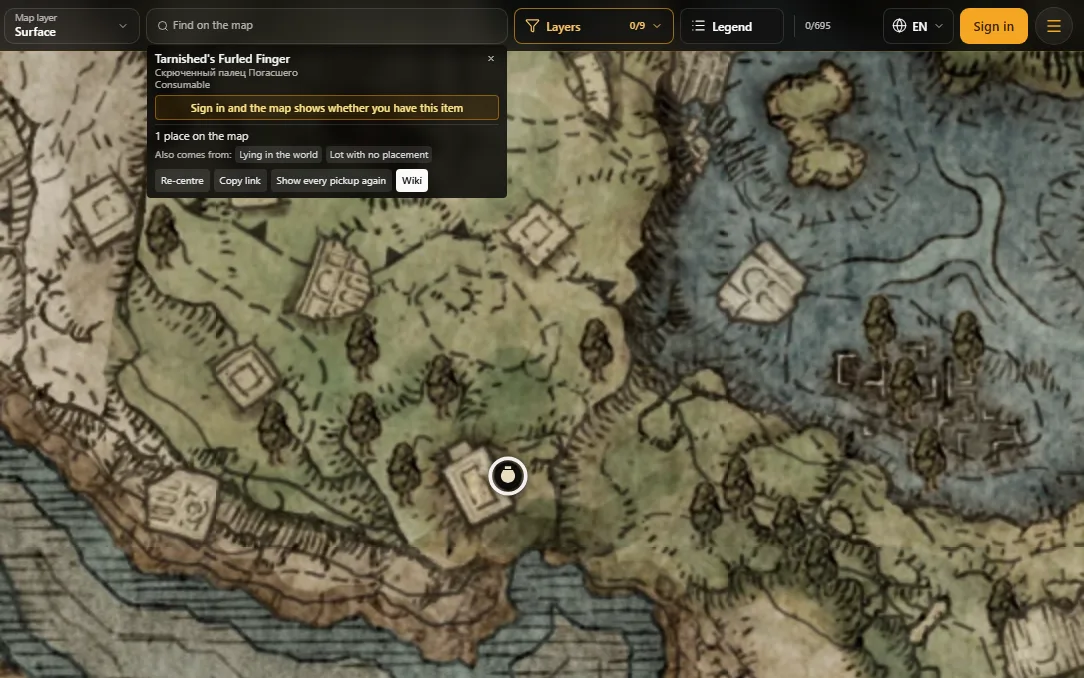
If a boss won't go down, call for help. There are three ways:
- Tarnished's Furled Finger
- - leaves a sign so other players can summon you.
- Furlcalling Finger Remedy
- - shows the signs of players ready to help you.
- Spirit ashes
- - they work offline too; all you need is the Spirit Calling Bell.
The Furlcalling Finger Remedy lies in 22 places on our map: Furlcalling Finger Remedy on the map
A cheat sheet for the whole episode:
- ✦Keep Golden Runes in your bag and use them right before you spend.
- ✦Raise Vigor first. Mind is FP, Intelligence powers sorceries.
- ✦Never drain your stamina to zero.
- ✦Keep your equip load under 70 percent.
- ✦Meet a weapon's requirements first, then look at the scaling letters.
- ✦Regular weapons go to +25 with Smithing Stones, special ones to +10 with Somber stones.
- ✦Roll through attacks, look for parries, backstabs and broken stance.
- ✦Watch the status bars, and use bleed yourself.
- ✦If a boss won't go down, call for help.
Links to everything in the video are in its pinned comment. Open the map
Footage and rights
Elden Ring © Bandai Namco / FromSoftware